Configuring X-Ways for a forensic analysis.
I am an X-Ways snob - all the other forensic tools are only posers. Here is how I configure X-Ways to process a disk image.
Refine Volume Snapshot
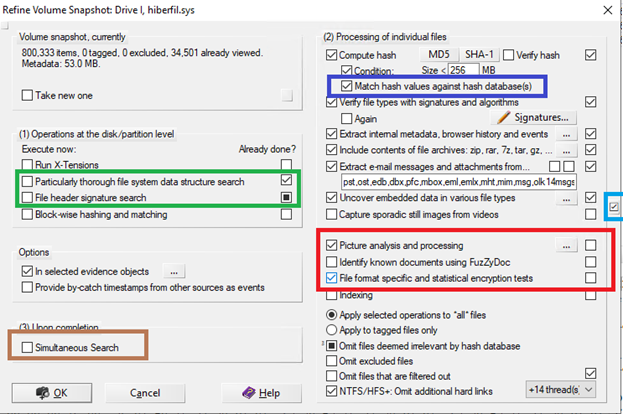
To begin press the Light Blue checkmark to get the default settings.
Unless you need it turn off the options in the Red box. These are usually used in a Law Enforcement investigations.
If you are processing overnight choose the green box options – they take longer. You can always do it later.
If you have a hash database choose the Blue box option.
If you want to do a search after processing choose the brown box. This can be done later.
Don’t forget to up the CPU thread count.
Caution – if you choose "Take a new one" under Volume Snapshot it wipes out all the processing you have done before.
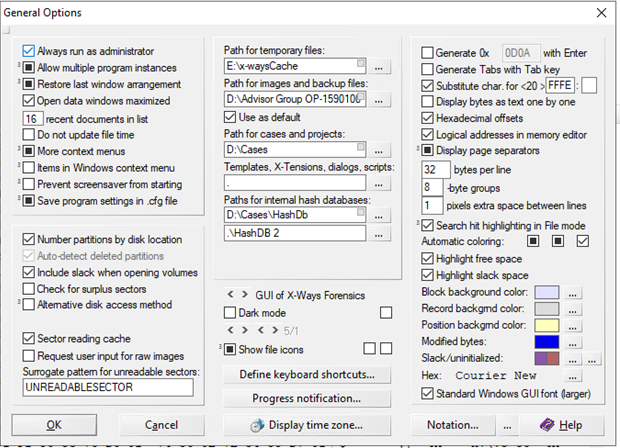
General Options
The paths help spread the workload among the drives and result in slightly better performance.
The most important in a shared environment is the Cases path. By default it puts the cases in your personal directory – if someone else wants to look at this case they will not be able. Put the cases folder on the evidence drive.
If you are going to use a Hash Database you need to set the path - the default setting will error.
Choose "Always run as administrator" to avoid issues.
The Display Time Zone can be changed at any time.
I like to set the 32 bytes per line which affects the hex display.
Viewer Conponent
You need to set the Viewer Component path for several things to work.
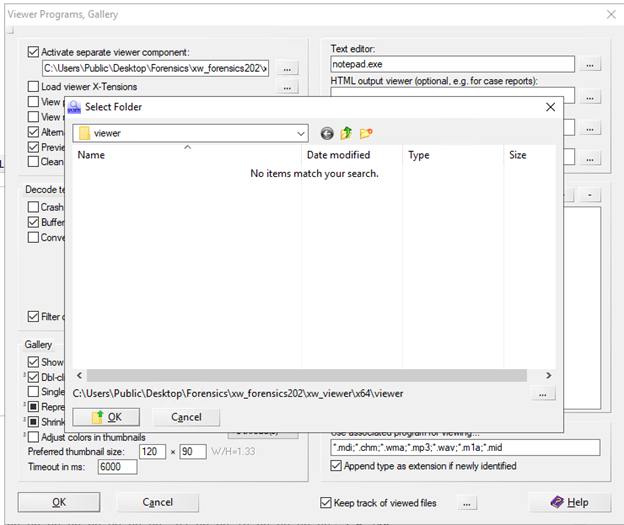
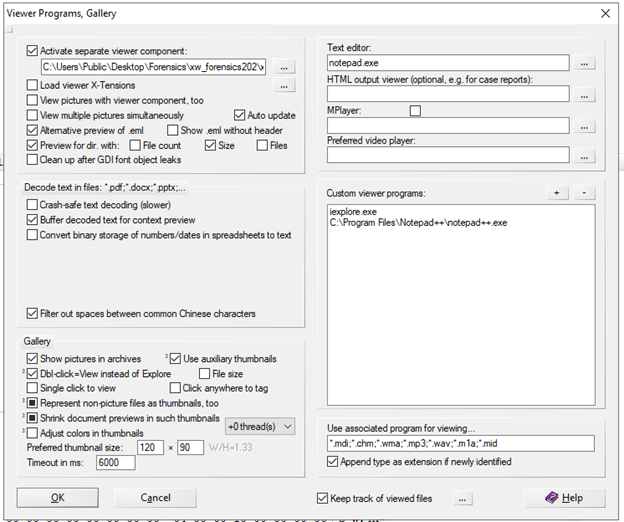
Viewer Programs
I always set Notepad++ and some other tools in the custom viewer programs – see below for the Viewer Component.
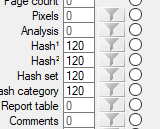
Directory Viewer
Finally edit the Directory Viewer Settings to enable the Hashes and other things you might want to include in the directory view. You can also change the order of the items.